AWF Safaris
COVID-19 Update
During this challenging and uncertain time of COVID-19, we have decided to postpone all 2020 AWF Safari trips to next year. The safety of our donors is paramount, as is the safety and health of our tourism industry partners and friends. This pandemic has been devastating and its impacts far-reaching, but some industries are hit harder than others. The tourism industry has been brought to a virtual halt overnight. This translates to canceled safaris and disappointment, but also countless loss of jobs. Lodges and camps are shut. Staff members and guides are out of work. The ripple effect is vast, and the effect on wildlife economies is massive.
What can you do to help?
Support the safari industry and dream of a better time in 2021 when you can get some African soil on the soles of your shoes. A time when you can sip your morning tea on the veranda of your tent overlooking the African plains, where you can sit among a herd of elephants and marvel at their incredible presence. Dream of lying in your canvas tent listening to lions roaring in the African night.
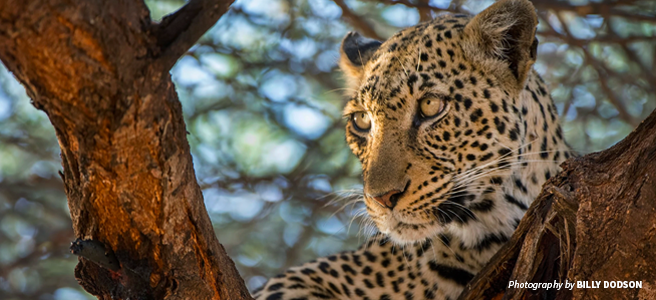
Africa is home to the most spectacular and awe-inspiring wildlife and landscapes in the world. There is no better way to enjoy these incredible world treasures than by joining a safari to experience the magnificence of the continent first hand. With a presence of six decades on the continent and 20 years of crafting stellar safari experiences, African Wildlife Foundation is uniquely positioned to offer exceptional itineraries that blend outstanding wildlife viewing with chances to see AWF's projects and learn about critical conservation issues from the experts.
Learn about our 2021 Safaris
Contact Carter Smith, Safari Program Manager, at [email protected] to learn about our exciting portfolio of safaris for 2021. Due to COVID-19, there is a significant increase in bookings for the coming year so we encourage you to act swiftly as space is limited.
Meet Your Safari Leaders
Craig R. Sholley

Craig R. Sholley's experiences with wildlife and conservation began in 1973 as a Peace Corps volunteer in the Democratic Republic of Congo, Africa. He has worked and traveled extensively since that time providing conservation expertise in a variety of world arenas. As an L.S.B. Leakey grant researcher in the late 1970s, Craig studied mountain gorillas at Rwanda’s celebrated Karisoke Research Centre with Dian Fossey. Returning to the U.S., he redirected his interests designing natural history educational programs and wildlife tours for the Baltimore Zoological Society. Concurrently, Craig led nature expeditions and photographed throughout Africa, South America, and Asia.
In late 1987, Craig returned to Africa full time to direct Rwanda's internationally known Mountain Gorilla Project. Turning the project over to the Rwandan government in early 1990, Craig continued in Rwanda acting as Scientific Advisor for the award-winning IMAX film, "Mountain Gorilla." Craig has served as a Senior Associate of the African Wildlife Foundation and on AWF’s Board of Trustees. He has also served on the Board of the Ecotourism Society. Throughout much of the ‘90s, Craig was Director of Conservation and Education for International Expeditions, an organization widely recognized for its ecotourism initiatives.
Craig returned to Rwanda in 1995 on assignment with the National Geographic Society surveying the conservation status of mountain gorillas in Rwanda, DRC, and Uganda in the aftermath of Rwanda's civil war. The findings of that trip are the basis of a 1995 article in the National Geographic Magazine on mountain gorilla conservation. Craig has worked full time with AWF for the last 18 years and presently serves as Senior Vice-President.
Carter Smith
Carter Smith moved to Kenya in 1994 to pursue her dream of a life in wildlife conservation in Africa, and she never looked back. Her early years in East Africa were spent living in the bush rehabilitating birds of prey while completing her graduate degree in Ecology on the Martial eagle. Following her graduate study, affiliated with Kenya Wildlife Service, National Museums of Kenya, and the University of Leicester, she went from eagles to elephants. She joined Save the Elephants and worked closely with Sir Iain Douglas-Hamilton as Donor Relations Officer. During this time, Carter became one of the first female licensed safari guides with the Kenya Safari Guide Association.
In 2005 Carter started her own safari venture and led private safaris throughout East Africa for 15 years. “I always feel privileged when someone asks me to create a safari for them. I have discovered that the real sense of success I receive is when guests return from their safari. I know that they will be profoundly affected. My favorite comment from a client was that it was not just a trip of a lifetime — it was a trip that changed her life. She had traveled the world, but said there was nothing like her safari experience.”
Carter joined African Wildlife Foundation in January 2019 to manage AWF Safaris and help the program reach and inspire a greater audience. She is thrilled to be continuing on her steadfast path of furthering African wildlife conservation.
Carter is the author of the children’s book "African Tea," which she wrote while living in the bush in Kenya.